Mermaid Isle Map & Locations
Every major zone, landmark, and Pearl route — from Cradle Reef to the edge-of-isle shrine.
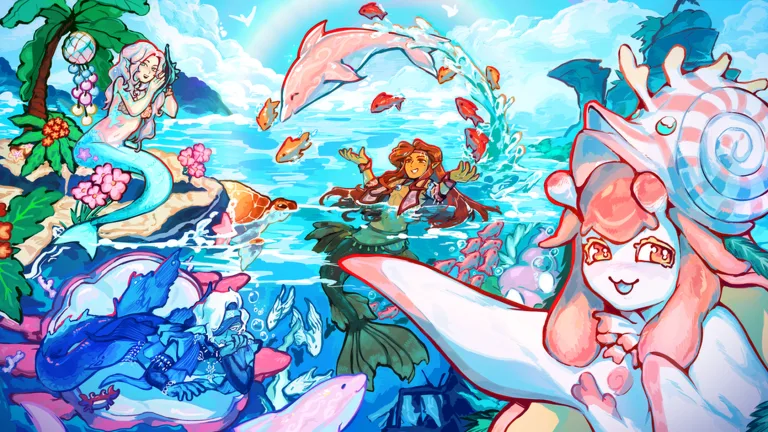
Knowing where you are in Mermaid Isle saves more time than any single code redemption. The Roblox map is not a dense open world, but it layers Cradle Reef onboarding, Soulshale Depths combat, Seabed Shrine spending, seasonal Arctic Gates, and Ocean Pearl Clam loops across one continuous ocean. This guide walks every major landmark, explains how zones connect, and shows how to navigate on PC and mobile without opening the map every minute.
If you have never finished the tutorial, start with Getting Started first. This page assumes you can swim, open Settings, and recognize the shop bag icon.
Map layout at a glance
Think of the Isle as a ring of explorable water around a central landmass. Most players spawn near Cradle Reef, swim outward toward deeper biomes, and use the world map pin system to mark event destinations. Combat content pulls you south into Soulshale Depths, while collectors hug the outer edge for Seabed Shrine and The Hermit’s Shop.
| Zone | Role | First visit priority |
|---|---|---|
| Cradle Reef | Hub, Gold dailies, Opaline Cavern | Day one |
| Soulshale Depths | Shellhorn, combat approach | After tutorial |
| Disharmony Pool | Instanced fights, Viscoria | When armed |
| Seabed Shrine | Radiant tail wishes | When Pearls saved |
| Selkie’s Plunge / Arctic Gates | Selkies Hymn escorts | During events |
| Hermit’s Shop | Rotating Pearl stock | Between shrine trips |
Cradle Reef — your home anchor
Cradle Reef is the shallow shoreline where new mermaids learn landmarks. Gold appears here during daytime for daily quests that pay 300 Pearls and occasionally roll Sandy Waves tails. The interior hides Opaline Cavern, which holds one of five Clam Monuments for Shining Song tails.
Cradle Reef is also the safest place to practice camera control before you sprint into Soulshale. Pick up visible clams along the reef lip — white clams grant 10 Pearls, blue 15, purple 20, golden 30, and black 50. When pickups thin out, hop servers rather than idling; respawn speed scales with lobby population as detailed in Farm Pearls Faster.
Soulshale Depths and the Disharmony Pool
Soulshale Depths sits deeper and darker than Cradle Reef. Narratively it feeds the Disharmony Pool, the Season of Myths combat arena where weapons, perks, and Viscoria boss runs live. You do not need combat gear to pass through Soulshale for exploration, but Disharmony content demands a loadout mindset.
Travel here when you are ready for Mermaid Isle Combat Guide mechanics — dodging telegraphs matters more than tail rarity. The Shellhorn also lives on Soulshale outskirts near Swirling Shoal; see the dedicated Shellhorn Guide when you want Pearl bursts from co-op singing.
Seabed Shrine — edge of the Isles
The Seabed Shrine occupies the map perimeter, easy to miss if you only shop from the bag icon. Spend Pearls here for wishes that roll tails from the active Radiant season — historically sets like Fateful Wish with animated waists. Full shrine mechanics, Divine Blessing buffs from codes, and budgeting advice live on Seabed Shrine Guide.
Pair shrine trips with Tails Guide research so you know whether the current pool matches your collection goals before you burn a five-figure Pearl balance.
Selkie’s Plunge and Arctic Gates
During The Selkies Hymn event, Selkie’s Plunge and the Arctic Gates become the escort destination for bonded seals. The Seal King briefing marks the gates on your map; Radiant Polar Star coats progress when seals reach the gates safely.
Outside event windows the gates may sit quiet, but remembering their position helps when Season of Myths returns. Walk through every escort step in Selkies Hymn Event Guide before you waste Mythtune glow on the wrong track.
The Hermit’s Shop
The Hermit’s Shop sits near shrine-adjacent content and sells rotating Pearl inventory — accessories, consumables, and occasional surprises. Unlike the main shop bag, Hermit stock shifts without a global announcement. Check in after clam loops and before shrine wishes so you do not double-buy items.
Hermit visits fit naturally into outer-ring routes: swim the perimeter, collect clams, preview Hermit shelves, then decide whether Seabed Shrine odds beat guaranteed shop sets on the Tier List Hub.
Ocean Pearl Clam spawn habits
Clams spawn across multiple zones, not only Cradle Reef. Efficient farmers combine:
- Shallow reef loops near spawn for white and blue clams
- Outer ring sweeps where golden and black clams appear less often but pay more
- Server hopping when a route feels empty for more than one respawn cycle
Black clams justify detours. If your map shows few icons, read Farm Pearls Faster for population tricks rather than widening blindly into combat zones unprepared.
Navigating on PC
PC players use WASD movement, mouse camera, and Space to surface. Shift lock helps straight-line swimming between landmarks. Open the Roblox map overlay when you need a macro view, then close it quickly — mid-swim map dependency slows Pearl income.
Practical PC habits:
- Set a mental compass: Cradle Reef sunward, depths outward, shrine along the rim.
- Use landmark silhouettes (Echoing Spires, giant conch for Shellhorn) instead of coordinates.
- Bind comfortable swim-down input before Soulshale dives.
- Keep Settings one click away for codes between zone transitions.
Full input tables and singing UI paths are on Controls Reference.
Navigating on mobile
Mobile relies on the dynamic thumbstick, drag-to-look camera, and tap prompts for NPCs. Landscape orientation improves singing precision during Shellhorn note spam. Mobile players struggle most with depth control — practice surfacing near Cradle Reef before long Soulshale swims.
Mobile navigation tips:
- Pinch-zoom the map when stationary, not while swimming through caves.
- Paste codes from the Codes Hub to avoid autocorrect breaking case-sensitive strings.
- Lower graphics in crowded event servers if frame drops make turning sluggish.
Cross-read Controls Reference for redemption steps and bubble singing basics.
Suggested exploration order
- Cradle Reef — clams, Gold dailies, shop price anchoring
- Perimeter loop — Hermit check, shrine preview, black clam hunt
- Soulshale Depths — Shellhorn co-op, combat portal scouting
- Event zones — Arctic Gates during Selkies Hymn
- Disharmony Pool — only after weapons and perks from combat guides
Map literacy pays off long term
Players who memorize three anchors — Cradle Reef, Soulshale Depths mouth, Seabed Shrine rim — spend less Pearls on wrong purchases and less time lost during escorts. The map is a navigation tool, not a checklist: swim it often enough that icons become muscle memory, and every guide on this wiki reads faster because you already know where the Isle hides its best payouts.
Frequently Asked Questions
Quick answers players look up before they dive back in.
Where is Cradle Reef on the Mermaid Isle map?
Cradle Reef is the shallow starter shoreline where many players spawn and where Gold offers daytime daily quests. Treat it as your home anchor while learning navigation.
How do I reach the Disharmony Pool?
Travel through Soulshale Depths following Season of Myths markers and combat quest dialog. Read the combat guide before entering with weapons equipped.
Where is the Seabed Shrine located?
On the outer edge of the Isles map. Swim the perimeter until you see the shrine structure, then spend Pearls on wishes during active Radiant seasons.
Where do Arctic Gates appear for Selkies Hymn?
The Seal King marks Arctic Gates during the Selkies Hymn event. Guide bonded seals to the gates to progress Radiant Polar Star coat rewards.
Do clams spawn outside Cradle Reef?
Yes. Ocean Pearl Clams appear across multiple zones. Outer ring routes often yield higher-value golden and black clams when respawns align.
Is the Mermaid Isle map the same on mobile and PC?
The world layout is identical. Controls differ — PC uses keyboard and mouse while mobile uses touch — but landmarks and zone connections are the same.